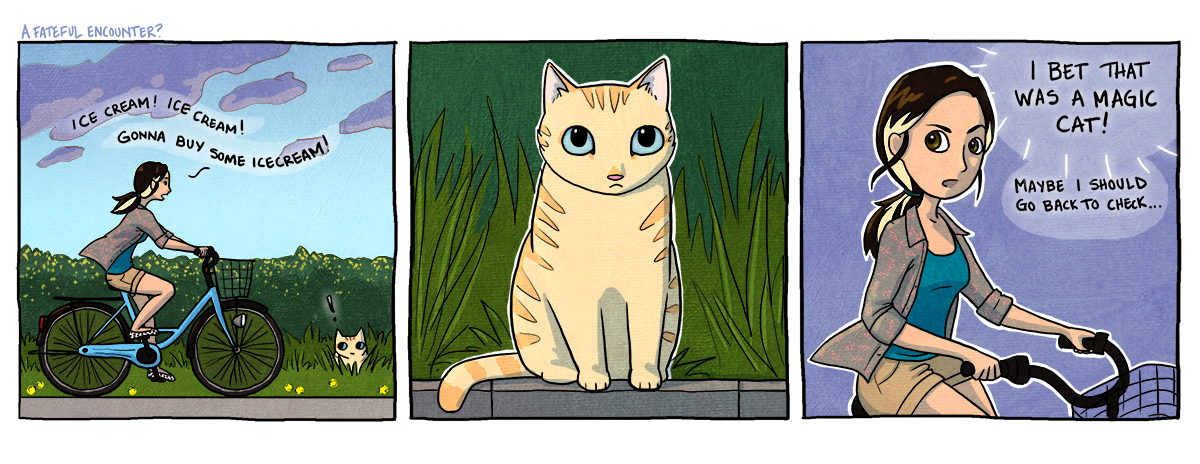
Right after that, I ran my bike off a cliff because I wasn’t paying attention. Next thing I know, my bike is exploding, I’m flying through the air, and the cat shows up to inexplicably save me with its magic powers. I thought maybe I was crazy when he first started talking to me, but that all changed when I discovered my own latent magic powers. We flew off into the sunset and that was the beginning of our fantastic hijinks.
Actually, I was a chicken and I didn’t go back to check if it was a magic cat. I was also rather intent on getting that ice cream. I’m pretty sure it was a magical cat though. I stared at him, he stared at me. We had a moment. If I see him again, I’ll know for sure.
![]()
I r bird! Wurship me!
When Mister and I were first considering our move out here, we had some apprehension about how we would keep ourselves entertained. Misawa is relatively small city of 40,000 or so located in northeastern Japan (the Tohoku region, which literally translates to “east north”) in a mostly agricultural, rural area. Many of the big tourist destinations, like Tokyo or Kyoto, are at least a 3-4 hour train ride away. Many people we asked were not particularly reassuring either. There would be a significant pause, and then they would say something like, “Well, there’s plenty to do if you like going outdoors.” I do like going outdoors, but the pause was worrisome.
Fortunately we took the chance. Misawa is in fact a great little city and in a beautiful region. Aomori (our prefecture/state) is full of all sorts of interesting destinations within easy day-trip distance. Gas is expensive in Japan, but when you have the perk of access to American gas prices? Road trips all the time!

One of our first excursions was to the Kabushima seagull shrine near the “big” city of Hachinohe. It was also our first experience driving unsupervised in Japan. That in itself was a bit of an adventure. I’ve learned it is difficult to get by in Japan without GPS (even if you are Japanese). Many roads are unlabeled and often GPS coordinates are more useful than addresses. On the upside, most road signs (on major roads/highways) are labeled in both Japanese and English. We armed ourselves with Google maps, some coordinates, and hoped the navigation gods didn’t lead us astray. (Fun fact, even though it is generally pretty useful, Google maps isn’t quite as refined in Japan as it is in the U.S. so sometimes it tries to send you down obscure alleyways or unpaved farm tracks.)
Mister and I picked this first destination rather flippantly. A shrine dedicated to seagulls you say? Sure, sounds more interesting than being stuck on a drab military base. Well, Kabushima is not just a shrine devoted to seagulls. It is set on top of a tiny rocky island where the black-tailed gull comes every spring/summer to nest and raise their young. This isn’t just a few seagulls, it is hordes of them.

Now, imagine if you will, one seagull. That soothing shrill cry, the brazen attitude, the proclivity for pooping on everything. Now imagine 40,000 of them in one place. The sound is nearly deafening and you are hard pressed not to trip on any as you make your way up to the shrine. For the record, baby seagulls are also pretty darn ugly.

Not pictured: Umbrellas for your protection at the bottom of the steps.

Still, it was a cool experience. It was a pleasant drive down the coast and my first chance to see something of Japan that wasn’t from an airplane window. I really enjoyed it after being cooped up in a hotel. In addition, Mister bought himself a good fortune.

Since all the fortunes were in Japanese, we assumed it was good since we didn’t get pooped on.
I also got the fattest, most adorable seagull shrine token.
![]()
It also had a fortune inside.
Oh and Wikipedia tells me that this specific cacophony is one of the “100 Soundscapes of Japan” so I guess I can check that off my list.
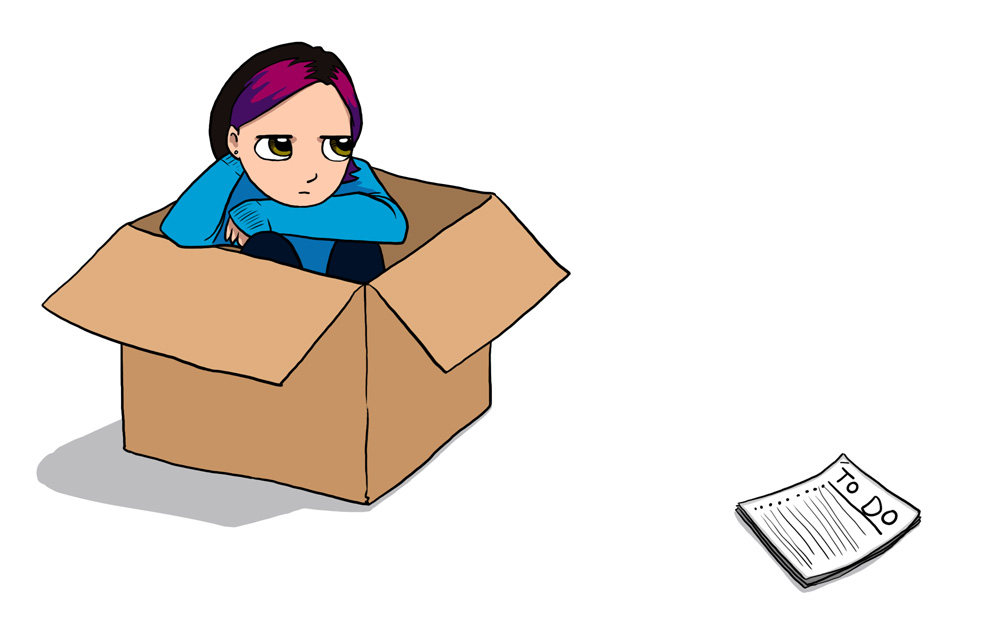
What’s this? New content!?……..Shhh, you’re just hallucinating.

I decided the other day that for each new project or craft I want to start, I have to make some sort of blog post first. Later that evening (as I’m working on a project I grandfathered in) I was struck with the inspiration to do a series of little comics illustrating brief moments of life in Japan. And I had a perfect idea for the first comic. It simply and brilliantly conveyed the quirkiness and charm of my everyday life here. I thought to myself, “Geez, I’m ingenious! I sure won’t forget this.”
Famous last words.
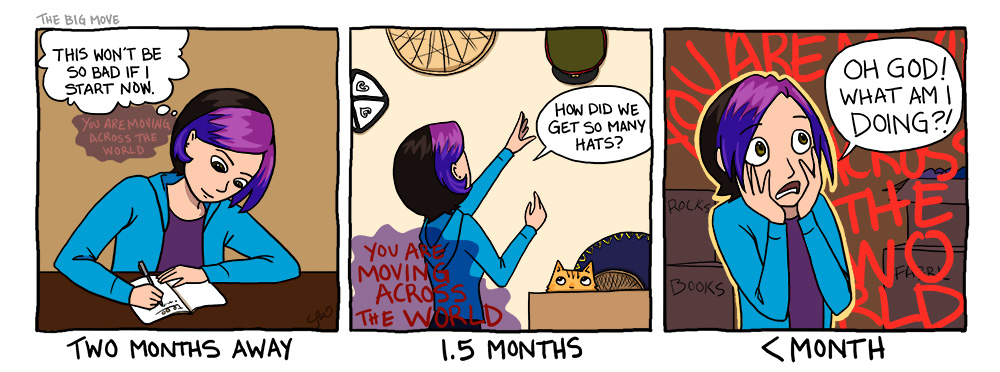
In between having this inspiration, and walking upstairs to write it down, the idea completely evaporated, leaving just the barest hint of what it might have been. I had been so pleased with the idea, that I’ve tried all week to recall it. It remains infuriatingly elusive. So instead I made a comic about losing my mind.
On an unrelated note, my apologies to anyone who has tried to comment in the past few months. My notifications system was broken and I didn’t realize it until today. I wasn’t just ignoring you, I promise.

So I’ve been in Japan for about a month now. I’ve eaten live fish, nearly made myself ill indulging in Japanese candies and junk food, slept through my first earthquake, and probably unknowingly committed some grievous public faux pas.
It’s taken a little bit to adjust to the fact that I’m actually in Japan and can start enjoying myself. The first week or so was a bit iffy. My cats were imprisoned, I was tired of living in hotel rooms, and it seemed like I might never see the sun. The traitorous voice that is afraid of new things tried to convince me everything was scary and things were not going to be alright.

It was so foggy, the airport was unusable for a week.
Of course, the traitorous voice was wrong. Things have since greatly improved. We found a house (a real full-sized house!) in a Japanese neighborhood instead of one of the American enclaves so it’s closer to everything. The kitties were successfully freed from Guantanameow and have adjusted well to their new home. The sun finally came out and the weather has been gorgeous. All this did a lot of good for my morale and I realized it is in fact pretty damn awesome here.
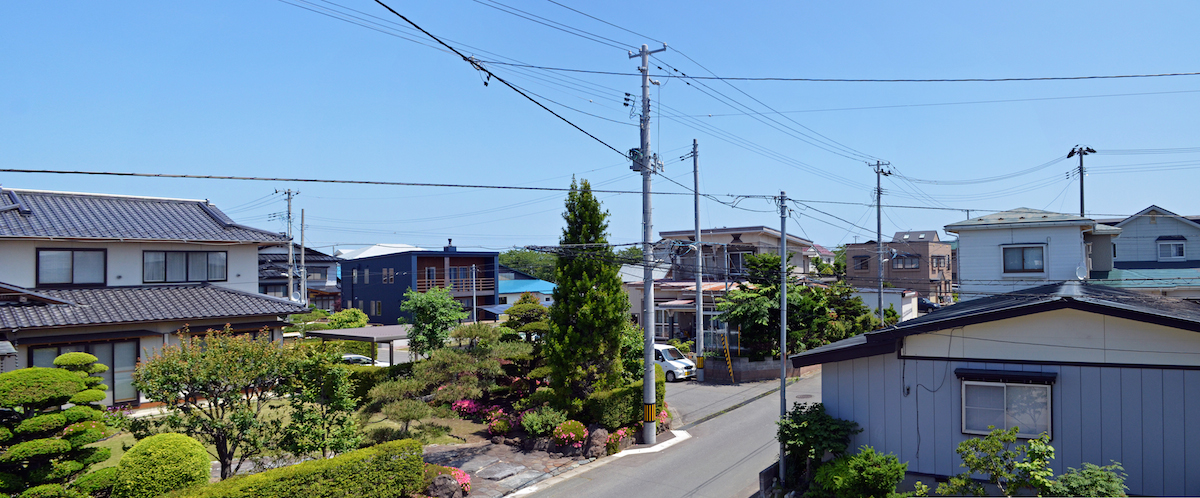
This is the view from my sewing room!
The only thing missing at this point is all of the rest of our stuff–like all our furniture, the rest of my kitchen, and all of my crafty supplies. I know that it has at least arrived in Japan, but it could be at least a week before it makes it to Misawa and then more to get to our house. That means no real crafty adventures until then and I’m really starting to get itchy fingers.
On the upside, I do have my fancy camera and I sort of know how to work it. We’ve already gotten out and started touring the region. Until the rest of my stuff shows up, I shall subject the masses to my travel adventures and photography.
(We made it to Japan! Here to recount some of our misadventures is Mister Boy.)
Originally, I was going to write this blog post as a sort of instructional guide on how to navigate the Japanese animal importation process for your pet cats. Having recently done so, I thought it would be a good way to assuage your fears and anxieties.
It turns out the process is fairly well explained by the Japanese Animal Quarantine Service (AQS), albeit not in chronological order. So I’ll skip most of the details, except for the parts we feel could use some clarifying. But what I won’t do is assuage your fears and anxieties, because if you screw it up—like we pretty much did, despite enormous amounts of planning and fretting and duck-alignment—things can go wrong for you, and your fluffy little buddy could spend six whole months locked away in kitty quarantine. So, instead, I am writing this post as a cautionary tale on what can go wrong.
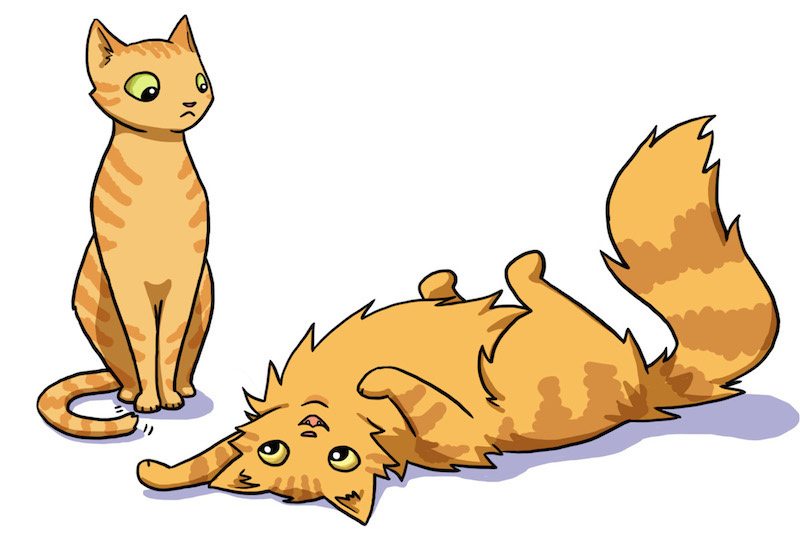
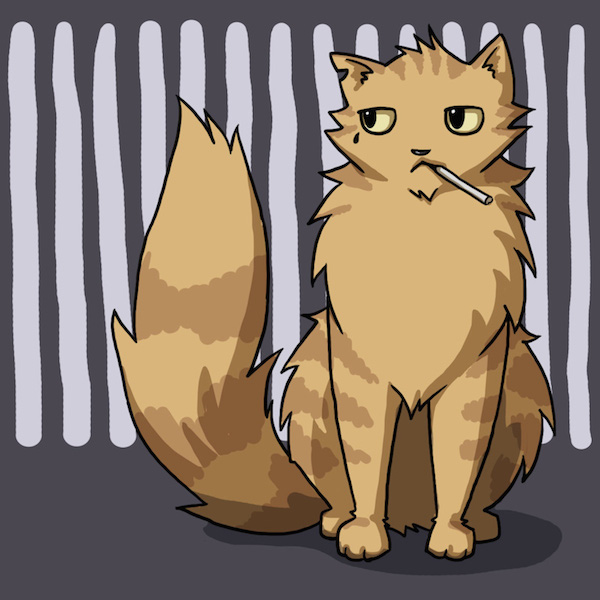
To add color to the narrative, let’s introduce the subjects. On the left is Little Man, aka smoker cat, aka Mr. Kitty, aka Buttface McGeezy. On the right is Cheesy Poof, aka the fat one, aka Booga Bear, aka Buttface McGeezy.
Pre-flight Preparation
I’ll assume that you’re starting this whole process at least seven months before you’re due to arrive in Japan, or else you’re completely screwed—your best hope is to find a foster home or release the cat into the wild. Get your cat microchipped, inoculated for rabies, and blood drawn and sent to Kansas State University as described by the regulations. The Japanese love themselves some regulations, and they are sticklers for the rules. The order of operations is very important. Our first mistake was doing each step of this process on different days for each of our cats, since our car couldn’t carry both of them at once. The dates on the documents differed for each cat, creating opportunity for error that the vet later stumbled into like a big dumb dinosaur into a tar pit.
When filing your advanced notification with AQS, your options are mail or fax. I strongly recommend hellofax.com as a web-based fax service. The first few faxes are free, it is easy to earn additional free faxes, and they transmit internationally. Figure out which AQS branch at Narita to send the notification to based on what terminal your airline uses. The notification process is actually quite good; they responded to us by email and we were able to clarify some of the confusing parts of the importation process.
A few days before your flight, you’ll have to have an APHIS Form 7001 filled out by your vet, as well as Forms A and C from the AQS. My advice: Double check all the information on these forms. You’ll then have to mail them off to APHIS for official government seals, and they won’t necessarily confirm that the information on the forms matches the source documents either.
Flying Day
You’ve got all your ducks in a row, your cat is locked safely in its prison cage, and you arrive at the check-in counter to check the cats as baggage. In our case, the incompetent desk staff spent an hour checking us in, then decided that we actually needed to take them to the cargo terminal. (This was a lie. Or, at best, a complete misunderstanding of their own system. If this happens to you, call the office you made the reservations with—United PetSafe for us—because even though you think that they were one of the twenty offices they called before deciding to fuck you over, they weren’t.)
So off you go to cargo, taking an airport taxi and paying even more money than the pet reservations should have. The cargo agent will be terse but efficient, and he’ll get the cats stowed away. Then you’ll be stranded at the cargo terminal, and will rely on the kindness of strangers to drop you off back at the passenger terminal.
Next you’ll enjoy your flight. I recommend getting hammered.
Arriving in Narita, your plans are now screwed. Your cats flew cargo instead of baggage, so you can’t pick them up in the baggage area like you’d hoped. No, once again you have to slough your way to the cargo terminal, this time with all your luggage. Your airline’s baggage assistance counter will hopefully have directions on a print-out, but your cab driver won’t speak any English. There is one saving grace: You are in Japan now, and the service will finally be fantastic.
An Introduction to Japanese Bureaucracy
At the cargo terminal, you’ll have to sign in at a security gate and receive visitor badges. The terminal is actually two levels, with United’s area on the lower level, which is a bit confusing. You’re now a good mile from the passenger terminal and the buses to Haneda, but the check-out process will take at least an hour, so it’s probably unwise to ask the cabbie to stick around. If you’re lucky, like us, the fantastic service will extend to the airline giving you a ride back to the terminal. Otherwise, you might have to call another cab, and hope that they can find you. Or walk.
At the customer service desk, your pets should be waiting for you. You’ll have to complete the quarantine and customs process next. The airline assigned a driver-cum-chaparone to guide us around the government complex. First stop is the AQS. Here they will scan your cat’s microchip and closely inspect your paperwork.
If you’re unlucky or careless like we were, this is where you will find out that the vet filled out the paperwork incorrectly. In our case, the vet put the wrong dates for a rabies vaccination and the blood test on Cheesy Poof’s forms. Even if you have the original vaccination certificates and the results from the blood test with the correct dates, if they aren’t sealed, AQS will disregard them: It’s the sealed forms that matter.
And do you know what incorrect forms gets you? Summary judgement for your cat: Six months in quarantine. Straight to Guantanameow. No credit for time served.
If you’re especially unlucky, you’re a regular schmoe planning on working in Japan. In this case, your cat will be kept by the AQS service right there at Narita. We were lucky enough to be moving to an air base, so AQS released our cats to be quarantined there. There was more light at the end of the tunnel: AQS said that if we could have new forms drawn up by the military vet with the correct dates, they could release Cheesy Poof from quarantine. This is very, very good news, since Cheesy Poof wouldn’t thrive in a prison environment.
Double check your paperwork.
The last step is a visit to the customs house across the street, where you probably won’t have to pay any additional duties so long as the cats are your pets (and not for sale). Then it’s back to the airline’s cargo service counter to pay any service fees, and off you go back to the terminal… with the cat, God willing.
Onward
Cats have been permitted on every bus we’ve taken so far (so long as they fit on your lap), and the regional train. They aren’t allowed on bullet trains unless they’re in a very small carrier. This came up when our flight to the airbase was cancelled, and we had to make alternate arrangements: either take the train, or fly to a nearby city and get to the airbase “somehow.” JAL does a very good job flying with pets domestically: The fee is a flat $50 per pet, they always fly baggage, and you don’t need reservations. I really like Japan.
We opted to fly, then took the bus to the train station, and a train to the airbase. Doing this with 120 lbs of luggage and two thoroughly unamused animals amounts to an extremely tiring adventure. The cats are a bit of a spectacle, and the Japanese riders tended to be amused by them instead of annoyed.
And that’s it. The cats are now safe and secure in the base kennel. The base vet is working with AQS in Tokyo to have Cheesy Poof’s quarantine lifted. We hope to bring him home with us next week. Total cost: Well over $2000, most of my sanity, and a dangerous brush with total calamity. To conclude, do not bring your cats Japan unless you absolutely can’t live without them. Like us.
Well, I am officially homeless for the immediate future. All I have to do now is sit around and play Pokemon until the big day of departure. Since Mister Boy pointed out there has been quite a bit of “the sky is falling” in my recent posts, here is something completely unrelated to moving or impending doom.
Remember those plushstaches from a while back? It turns out making your own mustaches is dangerous, because it’s hard to tell when to quit. At first it’s fine to have just a couple, but soon you find yourself asking “do I really have enough mustaches?” Today I will be the villain, but what if tomorrow I need to be a stoic cowboy? Black and brown are so droll, what about pink or teal? Or sparkles? It is truly a dangerous path.

Lucky for you, in the ongoing quest to fill-out my cache of ‘staches, I have created some new patterns! These are made the same as the previous ones, but in case you need help, here is my handy tutorial.
For your wearing pleasure, I introduce to you:

The dapper “Little Belgian Detective”

And the sure to impress “‘Boh ‘Stache”
You can get both patterns (it’s a two-in-one) right here:

Good luck and remember, a girl (or boy) can never have too many mustaches! Especially if they are horrendously trendy.
Just a short update to prove I’m still around. The move preparations march inexorably forward. Packers show up tomorrow. The appliances and big stuff have already been put in storage. Our most valued possessions have been entrusted to our friends for safekeeping. It’s starting to feel like this is actually real.
I’m once again reminded how much I hate the details of moving. Not the part where I end up in a new place, I think that’s fun and exciting. I even enjoy getting to unpack and arrange all my stuff. No, I hate all the parts that come in between, especially packing. Being a packrat, I have to sort through all my accumulated “treasures”. In the beginning it’s cathartic. I start tackling all the rat piles and purge the junk. Over time though, the continual barrage saps my willpower. Why do I have a large collection of pens with no ink? Twenty empty ribbon spools? Balls of thread clippings? Or enough plastic bags to build an effigy of myself? Blaaaargh!
Now I’m just exhausted–even though I don’t have to pack all the things myself. I still have all the post-packing cleaning ahead of me too. And just in case I thought I might not be ready to leave this place, the upstairs apartment once again gifted us with a bathtub of water via the ceiling above our bed–a bathtub of water mixed with bleach…yup, I’m ready to go.
I’m just going to say it now: things are probably going to get more erratic from here on out. And there will probably be some ranting and raving. Hopefully I will make it out the other side with some semblance of sanity.
Now that I have a definite date, I can feel the stress of the move building. Everyday the vague sense of doom gets just a little stronger. It lurks at the back of my mind and in unguarded moments I have flickers of panic. At some point I am sure it will devolve into full blown panic.
I’ve done big stressful moves before. I moved across the country to live in sin with the Boy-who-became-Mister, and I had no idea if it would work out or not. This is much worse. Moving across a huge ocean to an entirely different continent? Where I don’t even speak the language? With two cats? And I agreed to this because I wanted to do this? I might have been misguided.
Or further tips for the thrifty costumed caperer.

Lord Baron Von Partyfoul and The League of Evil
I survived my weekend of villainy, only to be struck down by an unknown malady. Curses! Now that I seem to have made a recovery, I shall continue this tale. Continue Reading…

Okay, I’m back! I spent last week down visiting the storied Grandma, down in North Carolina. I thought I’d be able to wrangle out a post while I was there, but as is often the case, my ambition and reality didn’t align. C’est la vie.
While I didn’t get any writing done, I did do a lot of plotting…nefarious plotting.The Mister and I have decided to turn to a part-time life of villainy (this may or may not coincide with a pubcrawl next week). As most of our dastardly plans revolve around making a public spectacle of ourselves (such is the wont of supervillains) we find ourselves in need of some dramatic costumes. Otherwise people might mistake us for regular villains. Or drunken louts. One of the two. Maybe both. Continue Reading…